In this post I will explain how we can add a custom field for a work type of existing team project.
To customize work item template we can make use of TFS power tool or witadmin command prompt options.
In this post I will show case TFS work item customization using TFS power tool.
Adding custom field using TFS power tool.
We can download Microsoft Visual Studio Team Foundation Server 2013 Power Tools from here,
same link will also provide all other feature details of power tool.
When we use power tool to customize the work item template, we can do customization directly on server or
we can export the template to local machine and import it to team project after customization.
To Export the template from the team project to local machine follow below steps.
Open Visual Studio 2013.
Click on TOOLS -> Process Editor-> Work Item Types->Export WIT

Connect to the Team Project collection. Here collection name is Awesome Collection.

Then select the Task Work Item Type from the Team Project of which work item template has to be customized the Click OK

Save the template in local machine.

When Asks for the pop up with message “Would you like in include the Global List definition?” Click on No button.

Below pop up window will appear on successful export of the template.

Now we can open the template in Visual Studio using power tool. Click on TOOLS -> Process Editor-> Work Item Types->Open WIT from File

This is how
template will look in Visual Studio when power tool is installed. This is
called template editor and we will see the Name and Description of the template
also 3 tabs named Fields, Layout and Workflow.
In Fields tab we
can create or define new work item field with different rules or validations.
Once we define field, we can make this field appeared in the work item UI using
Layout tab, where we can also preview the work item template and decide where
to place the field in the template UI. Workflow tab is used to define the
states and transition for the work item and we can also add some the rules to
the fields based on the stated of the work item, for example let us say all
fields in the temple should be non-editable when state of the work item is
Closed.

Let us create
two fields named Tech Decision and Management Decision with both
containing drop down values Approved, On-Hold, Rejected so that user can select
value in the work item UI.
Click on New
on the template editor

Fill in the data
as below
Name: Tech Decision
Type: String
Reference Name: YourCompanyName.Common.TecDecision
Help Text: Technical Decision Approved, On-Hold or Rejected
Reportable: Dimension
Note: Reference
name must contain minimum one period(.) and must not begin or end with
period(.)

To add the list
of values click on Rules then New

To add the list
of values we can make of the rule ALLOWED
VALUES and then Click OK

Below window
will popup

Click on New. And type Approved in the List Item box. Then
click ok.


Again click on New
to add one more list item Rejected.

And type
Rejected in the List Item box. Then click ok. Follow above step to add one more
list item On-Hold.

Click OK then OK.
Follow same
steps as Tech Decision to and new field Management Decision with values
Approved, On-Hold and then Rejected.


Now we can see
the new fields in fields list of template.
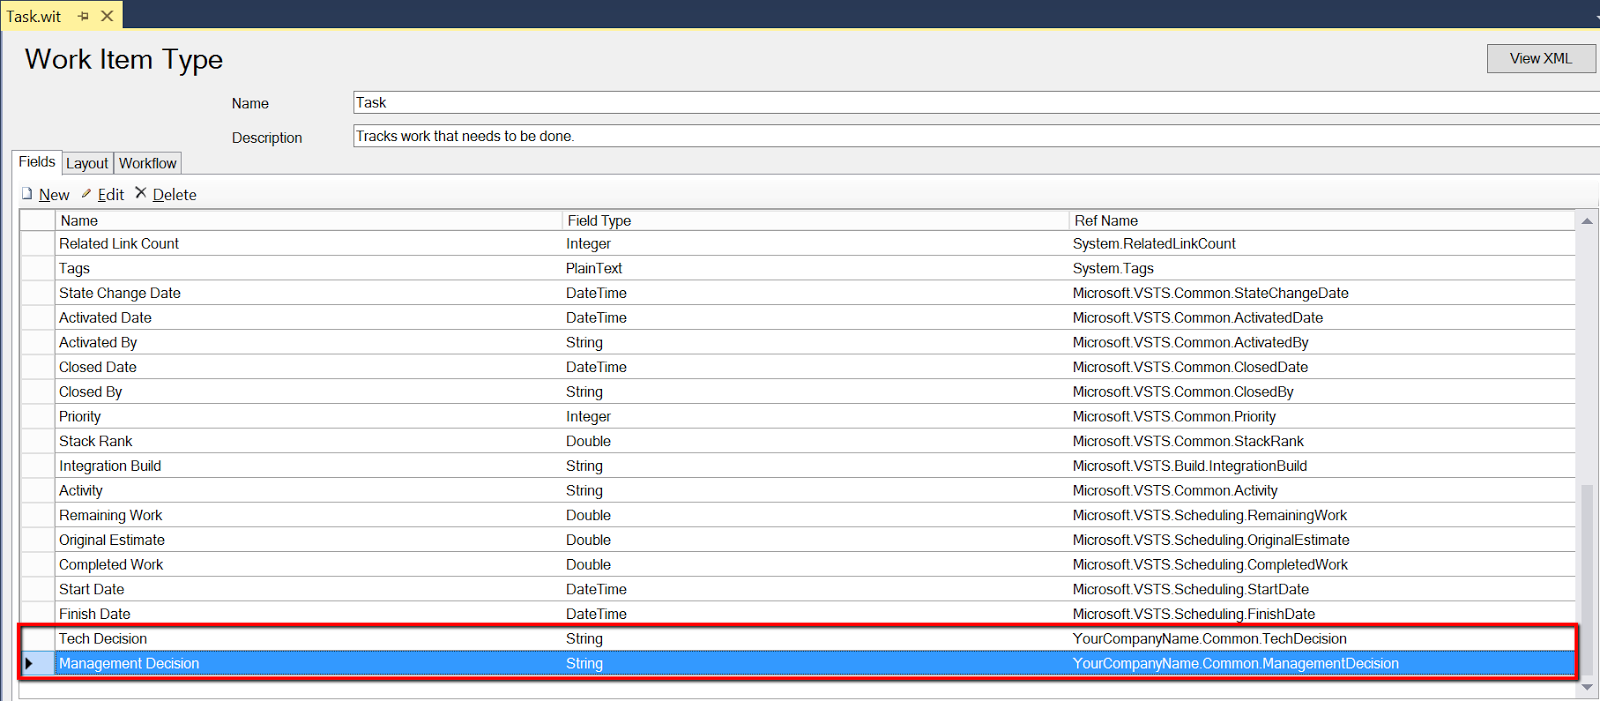
By completing
above steps we are just created the new fields Tech Decision and Management
Decision with list values. Now let us see how to put these fields in the work
item UI so that user can select the values. To edit the UI of the template we
will make use of Layout tab.
Click on Layout
tab.

Right Click on
the Column just above the Group Status,
then click on the New Group option to create new group named Decision.

Select the new
group and at the right side provide Label value as Decision

When we create a
group a default column will be added below, right click on the column to add
the control

Enter below
values for the attribute of the control and rest attributes we can leave as it
is.
Label: Tech Decision
Field Name: YourCompanyName.Common.TechDecision

Again right
click on the same colum and add new control give below details
Label: Management Decision
Field Name: YourCompanyName.Common.ManagementDecision

Now save the
changes and template is ready to import. We ca also have preview of template
before importing it to server. To have preview click on Preview Form button.


To import work
item to server, go to TOOLS ->
Process Editor-> Work Item Types->Import WIT

Now
browse for the Task.xml template and also select team project to which template
has to be imported, click OK.

Open Team
Explorer, click on Refresh button and then create new Task item from work items
tile. And you should able to view Decision group with fields Tech Decision and
Management Decision.


Nice post, useful information :)
ReplyDelete